

User guide3 min
Create your account
Creating an account takes about a minute. Enter your work email, type the six-digit code we send you, and choose a password. Or skip all that and sign up with Google.
Start with your email#
The first step confirms that the email address really belongs to you.
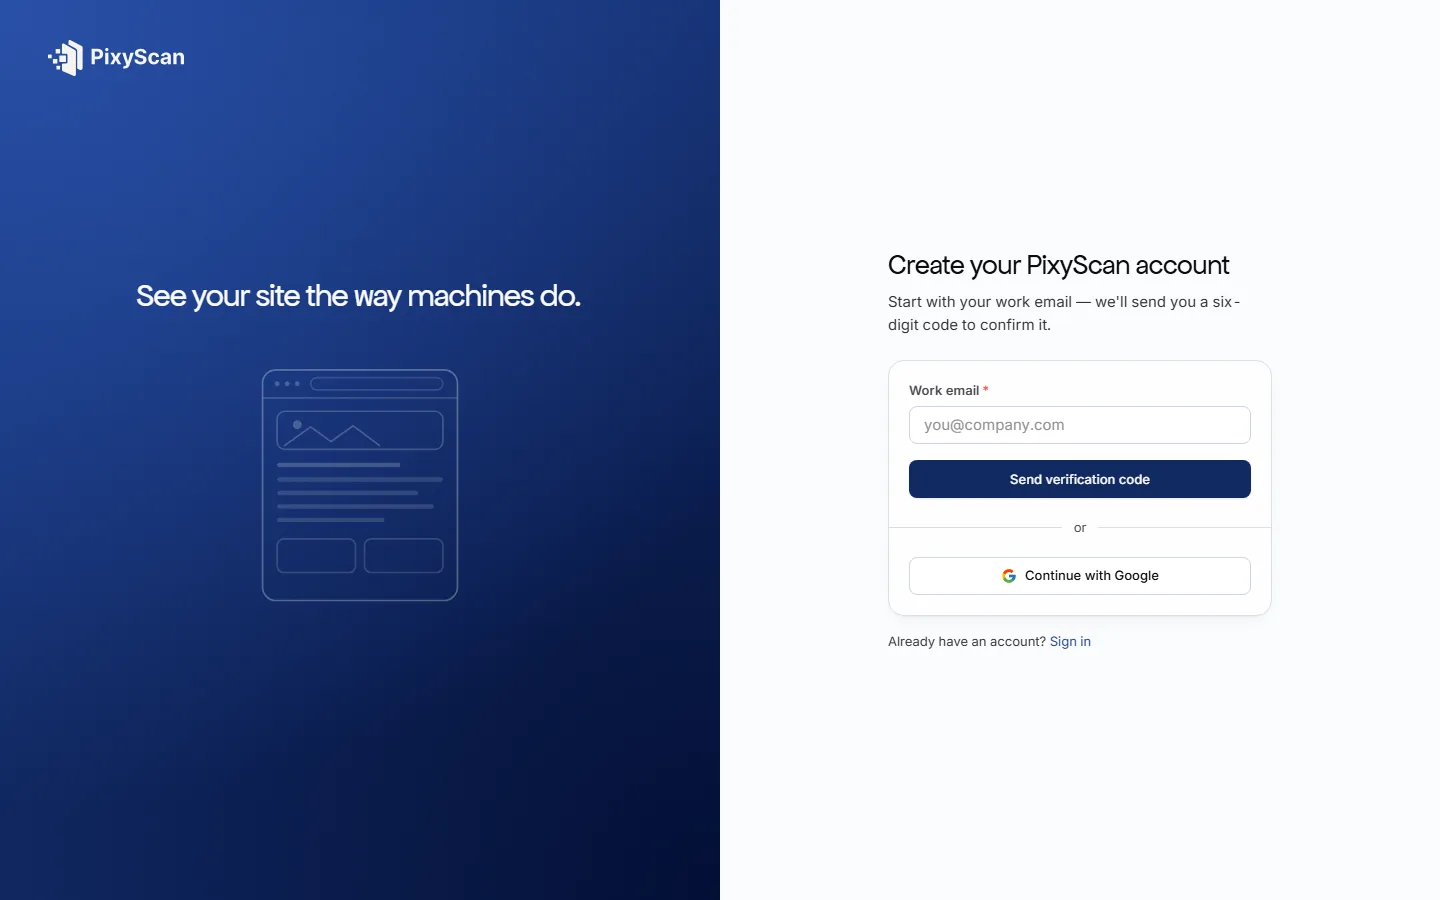
Open the sign-up screen, type your address in Work email and press Send verification code. PixyScan emails you a six-digit code and moves you to step two.
Closed the tab? Nothing has been created yet, so just start again.
app.pixyscan.com/signup
Enter the code and choose a password#
The second step asks for your name, the code from your inbox and a password.
- 1
Find the code in your inbox
It usually arrives within a few seconds. Can't see it? Check your spam or promotions folder.
Still nothing? Press Resend code. It becomes available 60 seconds after the last code. A new code replaces the old one, so use the latest email.
- 2
Fill in First name and Last name
Your teammates see this name on the Members screen and beside anything you do in a shared workspace. PixyScan also uses it to name your first workspace.
- 3
Type the code into Verification code
Enter the six digits exactly as they appear in the email.
- 4
Choose a password and type it again in Confirm password
A checklist under the field ticks off each rule as you type, so you can see which rule a password still misses. The rules are listed in the table below.
- 5
Press Create account
PixyScan creates your account, signs you in and opens your new workspace.
Seeing Account created instead? The automatic sign-in failed. Press Go to sign in and use the email and password you just chose.
- Minimum length
- 8 characters
- Must contain
- A lowercase letter
- Must contain
- An uppercase letter
- Must contain
- A number
- Must contain
- A symbol
- Code length
- 6 digits
app.pixyscan.com/signup
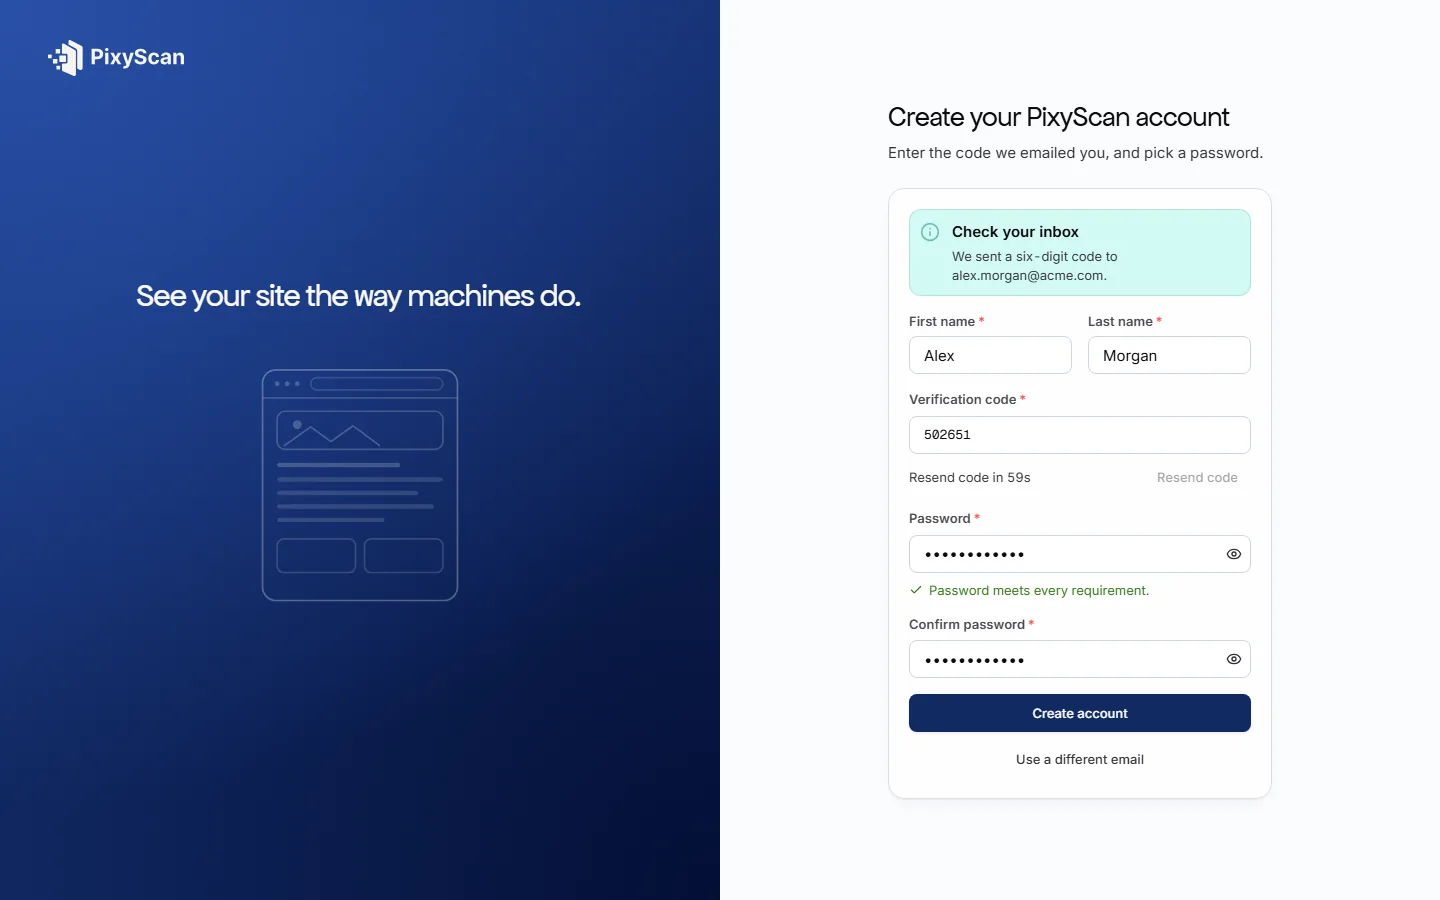
Each code is valid for 10 minutes
Or continue with Google#
Signing up with Google needs one click, and no code or password.
On the first step, press Continue with Google and choose the Google account you want to use. Google confirms your email address for PixyScan, so there is no code to type, and you land in your new workspace straight away.
An account created this way has no PixyScan password. To sign in later, press Continue with Google on the sign-in screen rather than typing an email and password.
If someone invited you#
Sign up with the same address the invitation was sent to.
- 1
Open the link in the invitation email
It shows the workspace, your role and when the invitation expires (two days after it was sent, by default).
- 2
Press Create your account
Sign-up opens with your address filled in. Keep that address. The invitation belongs to it and cannot be accepted from any other.
- 3
Press Accept invitation
Once your account exists, PixyScan brings you back to the invitation.
Invited accounts do not get a workspace of their own
Does something here not match what you see in the app? Tell us